Thursday, February 25, 2021

Family History Baseball Cards - Back


 The back of the cards can be personalized and made how you want. I simply included the following items:

1. Their name (matches the front) 

2. Fun facts or short stories about the person. I wanted them to give a glimpse of who the person really was and what they were like. This is in hopes that they will want to learn more about them and search out their histories. 

Sometimes getting stories are tricky some resources that I have found helpful are:

    a. Memories from living relatives. I don't remember very many of        my grandparents, but I asked my siblings, cousins, and parents for        information about them. If there is not a history about the person,        consider writing down the info you learn as part of a history. 

    b. Look for oral or written histories. I found that each of my                grandparents had a written history. Some were more detailed than others, but they were good starting        points. I found a cassette tape with my grandmother telling her history on it. That was a priceless                treasure find!

    c. Read their children's histories or their parents histories. If you don't have a lot of information about         an individual, search both their descendants and their ancestors for histories that may mention them.         It's amazing what you can find out about some one through these finds. 

    d. Look in local histories. I was able to find some info about my great-grandparents in histories that        were written about the settling of the community. They happened to be a part of it so I was able to               find them. 

3. Optional - You could also include a family picture of their spouse and posterity. I tried this a few times but found that I would rather have the stories vs. the photo. 

I hope that this helps you as you put together these amazing treasures that your family will love! 

Tuesday, March 10, 2020

Family History Baseball Cards - Front of Cards

A few years ago, I saw this post about a lady making Ancestor Trading Cards. I loved the idea and decided to make my own Family History Baseball cards. It has been an amazing experience as I have tried to find information about my ancestors. I have felt led to things (especially pictures and signatures) that I could not have found on my own.
Although I loved the idea of the baseball cards, I wanted to make them a little larger so it was easier to see the information. Also as I was making them, I decided that I wanted to share highlights from their lives so that we could learn more about our ancestors. I decided to make them 4x6 size because it is an standard size for photos in the U.S. It made printing them a breeze. Then I just put the front and back together in a photo album.

Each card front includes (top to bottom): 

  • Full name as well as any nicknames
  • If they served in the military, then that information is included as well as a symbol
  • If they served a mission for The Church of Jesus Christ of Latter-day Saints, then that information is included along with a symbol and possibly a map of their mission. 
  • I try to include 4 pictures - as a child, as a young adult, a wedding picture or couple picture, and as an older person. 
  • Their signature or some other writing that they have created. This is something that they have created and it's cool to see something that is personally connected to them. 
  • Birth, and Death date
  • Marriage date & location as well as age at time of marriage and spouse's name and age are included
  • For the women, I include a buggy with the number of children that they had, along with any that they may have helped raise. 

Here are some tips if you would like to try making them on your own. I created them in Photo shop, but there are other programs you could make them in as well.

Tips:

  1. Make a spreadsheet that includes all of the information that you want to include. It can become a checklist as you do each card. 
  2. Then gather any pictures or signatures you want and put them all into a digital file together. (Example: For Ruth Rowe her file was names "Ruth Rowe" and then I put a copy of anything I wanted to include on her baseball card in that folder)
  3. Set up a template in your preferred program 
  4. Choose a different background color for each family line. My mom's line have a red background, my dad's family has blue for the background. My husband's parents lines have purple (mother) and green (father). Then if you decide to put them all in one book you can easily see who belongs to who. 
  5. Include some kind of pedigree or list so you can see how everyone is related. 
  6. Make a key for the book so people know what information is included. 
  7. Finding a signature can be tricky. Look for military registration cards, driver's license, death or birth certificates, immigration papers, old family books, or other family letters or cards. 
  8. If you don't have all of the information, still make a card and include what you have. Sometimes you can do a husband and wife on one card if you don't have a lot of information 


In the next post, I'll talk about what is included on the back of the cards. 


I hope this helps you get started on this amazing project. You can purchase the templates for these in my etsy shop. If you would me to help put them together, send me a message, and I can help you for a fee. 


Tuesday, May 7, 2019

Hit the road, Jack!


 Family vacations are a very important tradition for us. Over the years, we have visited Zion National Park, Arches National Park, Disneyland, Oregon coast, Mount Rushmore, Grand Canyon, Mesa Verde, Missouri, Minnesota, Goblin Valley (several times), and plus several other places that are near and far. Needless to say, over the past 14 years, we have learnt a few tricks that work for our family when we hit the road.

1. Take time - I usually plan on an extra 2 hours of travel when children are involved in road trips. So if it's 10 hours with no stops, that becomes at least 12 hours with very few stops. We usually choose to break our travel days up if the travel time will be more than 8-10 hours total. For us, this is the max that we can all handle in our family. :) We also choose wisely where we eat lunch. Usually we bring lunch fixings with us and make lunch at a park. This lets everyone get out and stretch. It also lets us all get some energy out.
I have also found that it is better to plan an extra day than to feel rushed and not get to enjoy your time.

2. Potty Time - A mandatory rule in our family is that EVERYONE tries to use the bathroom when we are someplace that has a bathroom. We instituted this rule when we went on a multi day, multi state road trip when our older children were younger. We quickly learnt that if we didn't take a potty break when we filled up with gas or stopped for some other reason, with in 30 minutes of being on the road, one of the children would say the dreaded words "I need to go to the bathroom NOW!". To avoid frustration, anger, and making a long day longer, we now have EVERYONE try to use the bathroom when we stop. If we have a child in diapers, we change the diaper as well.

3. Entertainment - We have made a conscious decision NOT to have a dvd player in our vehicles.  We did purchase a portable one that has been great. We have used it maybe 5 times in our van, but countless times at the various hotels we have stayed at. For our children, they do better if we don't have a movie on in the van. They are more aware of what is going on and what we are seeing as we drive.
So you may ask, "If you don't have a dvd player, then what do you do for entertainment?" We LOVE listening to audio books. I try to find ones that both children and adults will enjoy. One of our favorite series is the "Henry Huggins" books. They are funny, geared towards boys (always a plus when you have several boys), and entertaining. We've also enjoyed "Chitty, Chitty, Bang Bang" and for older kids the "Fablehaven" and "Ranger's Apprentice" series are wonderful.  For the younger crowd "A to Z" and "Baseball" mysteries have been fun. We always try to make a fun road trip cd with songs that we like.
We always encourage our children to bring a bag of things to do. This can include small toys (but no legos, they get lost too easily), books, coloring and/or art supplies, and small crafts. We have discovered some fun travel games that the kids have enjoyed. Some favorites include Bop it, Stencils, Hang man, and tic tac toe. If you search on Amazon, you can find loads of magnetic games.
I highly recommend getting a magnetic cookie sheet from Dollar Tree. These are just the right size for kids laps and perfect for magnetic games.
I always check out the dollar section of Target. I usually find some good things there too. Once I found some rhyming, abc, and counting puzzle cards. They fit perfectly into a pencil holder bag. I also found a mini jenga type game either at Target or Dollar Tree.
I also try to find some new to us toys that the kids might like. I also have "educational" workbooks that I encourage my kids to do to help with boredom and learning.

4. Packing - A family of 8 has a TON of clothes! I learned to use gallon size ziploc storage bags to help with fitting it all into our luggage. For younger children, you can actually fit two outfits in one bag. For the older children, you can put one outfit per bag (socks, underwear, pants, & shirt). Then you press all of the air out of the bag so it's like a vacuum bag. I like to write my child's name on it as well as what days they plan on wearing the clothes. If we are gone longer than a week, we just plan on doing laundry while we travel. I usually take a few 'pods' of laundry detergent and a ziploc sandwich bag with dryer sheets so I don't have to purchase the more expensive items at the hotel.

5. Lodging & Food - We have a big family, and if possible we try to get a suite size room that sleeps 6. Since some of our kiddos are still little, we can squish some together and we fit. If we can't get a larger room, we usually get a double queen room. We also ask for a roll-a-way bed and use that for two of the younger kids. Sleeping bags that roll up small work good too. As our children grow, we will probably have to get two rooms or look at doing airbnb or vrbo if those options are available.
Breakfast - When we stay at  a hotel, we look for one that offers breakfast so that we can eat there and not have to worry about eating out or bringing cereal with us. Occasionally that doesn't work and we pick up a box of cereal and some milk at a local grocery store.
Lunch - We bring along lunch fixings - bread, meat, peanut butter, jam, chips, fruit & veggies, crackers, etc. If it is a travel day, we usually make the meal at a park at lunch time and let the kids play. If it is a sight seeing day, we make lunch before we leave the hotel and keep it in a small cooler (if possible). We also bring along snacks and trail mix for after noon hunger cravings, especially if we are going to have a late dinner (think Disneyland). This helps tide us over until we can grab dinner.
Dinner - Depending on where we are, sometimes we will either purchase food at a local grocery store and make dinner at the hotel, eat out (fast food usually), or bring left overs from home.

6. Plan it out - I have found that I'm not as stressed if I take time to plan it out. For bigger vacations, I start about a year in advance. This gives me time to research what we want to do and how long we should take in each location. It also is nice because I can watch hotel prices and book when they are first available.
A few years ago, we started creating an itinary for our trips. This gives us an overall view and big picture of what we are doing and where we are going. I include the address of the lodging for the night along with the price, phone number and other important information. This is great, especially if we don't have cell service nearby. I print off each day on a separate page. I put all of the pages into a three ring binder along with any coupons, information, or other items that we might need for the each day. If they are loose, I put them in a sheet protector. This binder stays next to the passenger seat.
We have saved our itinaries and shared them with other people to give them an example of a plan. We also make notes on them so we can remember what worked and what didn't.
My children love to see where we are going each day. I try to either give them a copy of the itineray or a copy of a map of the area with the places we will be visiting highlighted. This can be taped onto the back of their cookie sheet.
We like to try to go during the off season. It works better for everyone, but especially for our son with autism. Less crowds, less anxiety, and less stress are always good combinations for a fun vacation! This often means that we take our children out of school to go on a family vacation. We both value education very much and feel like it's very important. However, quality family time and fun learning experiences are part of that education. We are careful to work with the teachers and try to utilize random days that they have off.

I hope that you will take the time to create some fun family memories with your family. I hope that this post helps you to do that!


Wednesday, April 17, 2019

Sleeping well

When we got married we bought a mattress and a bed frame. It lasted us almost 13 years. The bed frame was in good shape (it was a hand made, log bed) but the mattress had seen better days and needed to be replaced. We also decided to up grade to a king size bed from a queen.

So began the search for the right mattress for us. My husband is amazing at doing research (actually he's just plain amazing!) for products that we are interested in. So he did most of the research. After all was said and done, it came down to three mattresses - the Casper, the Purple, and the Intellibed. 
Casper and Purple are both online companies and we were hesitant to buy without trying. (Although they did have a return policy). So we decided to go to an Intellibed store and try that one first.
From the minute we laid down on the bed, I knew that I would have a hard time not buying the bed. we tried the various levels of beds and learned more about the company. After we walked out of the store, my husband and I talked about our experience and both agreed that we had found the right bed for us. We have now had it for over a year and both still agree that it is one of the best purchases that we have ever made. 

Here is what we love about the bed: 
It's non toxic.  All mattresses are required to have a fire wall around them. These fire walls are not regulated and the majority of mattress options have chemicals in their firewalls. Intellibeds are non toxic, meaning there are NO toxins in your mattress or in the fire wall that surrounds it. 
Firm yet soft.  These mattresses are firm, yet very soft. Your body is well supported and yet it is very comfortable to sleep on. 
Small Movement -  We chose the "Sapphire" from the Legacy Collection. I cannot feel my husband when he moves in the bed. We have talked about how nice it is to not feel when the other person is tossing and turning. 
Amazing Warranty - The Intellibed has a warranty for 20 years! If it sinks more than 3/4 of an inch during that time, they will repair it or replace it for free! Even if it is year 19! They don't prorate the warranty, it's good for all 20 years.
Customer Service - They are just amazing. Whenever I contact them, they are kind, considerate, and easy to work with. 

This bed is SO amazing! Even when I get very little sleep or am up a lot in the night with my children, I still feel so good when I wake up! (Maybe still sleepy, but my body feels good). I recently slept on my daughter's bed for a good portion of the night. It's a basic mattress on a twin size bed. I woke up and my hips and back were aching. I was sooo happy to get back into my own bed. LOL.
We also purchased a adjustable base with our bed. (Actually, the promotion was that we got the base for free). We LOVE the base! It not only adjusts, but it also vibrates on several different settings. That was such a blessing when I was pregnant with our last baby. I would lay on it each day and get a massage! The base also has the same warranty as the bed. 

Intellibeds are more expensive upfront, however, when you factor in the warranty and how well you will sleep on it, we feel like it was well worth the investment! So if you are looking for a new mattress, check out Intellibed and see if it's right for you. They often will have various promotions throughout the year. We bought ours around Christmas and they had the base for free. In the spring, they usually have a demo bed sale.
This is not a paid review and I did not get compensated for it. I just wanted to share what we have LOVED! 

Thursday, March 28, 2019

Fun Birthday Invitations

For a long time I have enjoyed creating things in Photoshop. I find it easy to do and a way to do something that develops a talent.
 One type of thing that I enjoy doing is making invitations and announcements for family and friends. Here are some samples of kids birthday invitations that I have done in the past. I've changed the names or blanked out the personal details. If you are interested in having me make a customized invitation for you next event, please leave me a message and I will contact you!


Kirby Birthday Party for 9 year old

My child wanted a Kirby birthday party. I searched the web and Pinterest but didn't find a lot of inspiration. I did find this blog which gave me some ideas that I customized for our party. I thought I would share what I did to help others out.
First the invitation: I let my child help me make this in Photoshop. It was pretty basic but turned out just how we wanted it to be.

If you would like me to customize one for you, please contact me about the details and the cost. 

For decorations ( we had it in our basement) We hung gold stars with yellow ribbon and pink balloons (using the magic of static electricity) from the ceiling. The plan was to decorate the balloons to look like Kirby, but we ran out of time. :) I found the stars and ribbon at a local party supply store.  We also had crate paper hanging along the wall. 


Next came the games. I let my child plan what games we would play at the party. This is what we came up with: 
"Knock the Bosses down"
   This was a simple game of bean bag throwing. Although I think if we did it again, we would have it be a dart/ball gun shooting game. I found these images online and edited them in Photoshop to make them bigger. Then I taped them onto some big red plastic cups. We made a pyramid out of them 
"Pin the Hammer on King Dedede"
   This was a birthday kid pick. We found an image online of King Dedede, enlarged it to fit an 8.5x11 paper. We also found an image of the hammer and made it to match the size of his fist. Then played it like "Pin the tail on the donkey". Pretty basic but lots of fun. 
"Speed Kirby"
 We have a retro NES that we purchased this past summer. It has a Kirby game on it that our children LOVE to play. So for one of the games we played "Speed Kirby". Each child at the party got to play Kirby for one minute. When the timer went off, they paused the game and passed it to the next child. I had their names written down randomly and they just went in that order. Everyone enjoyed it and had fun playing it.
Cupcakes:
After playing the games, we gathered around the table in the kitchen and decorated cupcakes. I had pink frosting and mini oreos (for the mouth and eyes). The kids went to town decorating their own cupcake however they wanted. Some made Kirby, but most just decorated it to fit their personality. After the birthday child's cupcake was decorated, we sang Happy Birthday and blew out candles. 
Following the cupcakes, we opened presents and then the kids went out side for one more game. They played "Kirby Tag". The person who was it, was Kirby and every one else was the bosses. If Kirby froze all of the bosses then he won the game.  They had fun with it. 
Favors:
As a parting gift, we gave the kids star sunglasses, a pokey ball, and a pink balloon.  
It was a fun party and as I prepared for it, I learned more about Kirby and his adventures! :) 


Tuesday, April 3, 2018

Moab Utah with a family

We recently returned from a fun family vacation to Moab, UT. It was a great time of year to go, not too cold and not too many crowds. We have a family of seven with children ranging in ages 12 down to 2. We put our little one in the backpack some of the time but also let her hike when we weren't in a hurry.  We went to Arches, Canyonlands, and Bears Ears. Here are some things we learned along the way.

MOAB

  • Lodging: Hotels there are expensive. I looked at both air bnb and hotels. The hotel was less expensive for our group than a air bnb. I would check both though. Also check early and check often. I had found a hotel but checked a few days before we left and found a hotel that was higher rated (on trip advisor) and a better price. We chose to stay at Moab Valley Inn. Their rooms were roomy (enough to have a roll away bed and it not be in the way) and beds were comfortable. They also had a hot breakfast (along with cold cereal). Their staff was also super helpful.
  • Gas is expensive, so be prepared for that. 
  • Eating: We ate at a couple of nice places for dinner. One was the Moab Diner. It's a 50's style diner. They are friendly, super helpful, and the food is good and not too expensive. It's a very kid friendly environment.   We also ate at Milt's Stop & Eat. They mainly serve hamburgers and other sandwiches. They have regular ones and also specialty ones. You can choose what kind of meat you want your burger to be. They also have fries and shakes. We loved the hamburgers and the shake. We were not big fans of the fries. The seating (inside and outside) is very limited. We opted to take the food back to the hotel. We also ordered pizza from Pizza Hut. It was pretty good. 
  • Shopping:  There are a couple of grocery stores and hardware stores but no big box stores in Moab. There are however lots of specialty stores that you can pick up some cool souvenirs from. 
ARCHES NATIONAL PARK
We visited several areas in the park. I highly recommend going early into the park. You will miss some of the crowds and the heat (if it's a hot time of the year). Also take plenty of water with you, dress for the weather, and have good shoes on if you're planning on hiking at all. 
  • Windows and Turret Arches: We went here in the evening our first night. It was a great way to burn off energy after traveling awhile. It's a short .5 mile hike loop with a good trail. There are some awesome views that you can get as well. 
  • Double Arch: This is right next to the windows arches. It's also .5 mile hike (round trip). There is some slickrock climbing that you have to do to get up by the arches, but again great views and fairly doable with kids. It's really pretty at sunset. 
  • Devil's Garden: This is one of the most popular areas of the park. I assume it's because the trail is well groomed and the hikes to quite a few arches are easy and short. We visited Tunnel Arch, Pine tree Arch, and Landscape arch. It was about 1.5 miles round trip but the trail was easy with a few up and down hills but nothing too hard. 
  • Sand Dune Arch: This is an awesome arch. Again it's only about a .5 mile roundtrip  hike and the trail is easy. You get to walk through a little slot canyon. The whole ground is covered with beautiful, soft orange sand. There are lots of places to climb and play once you get to the arch. Some families had even brought buckets and shovels to use in the sand. It was by far one of our favorite places that we visited on our trip. 
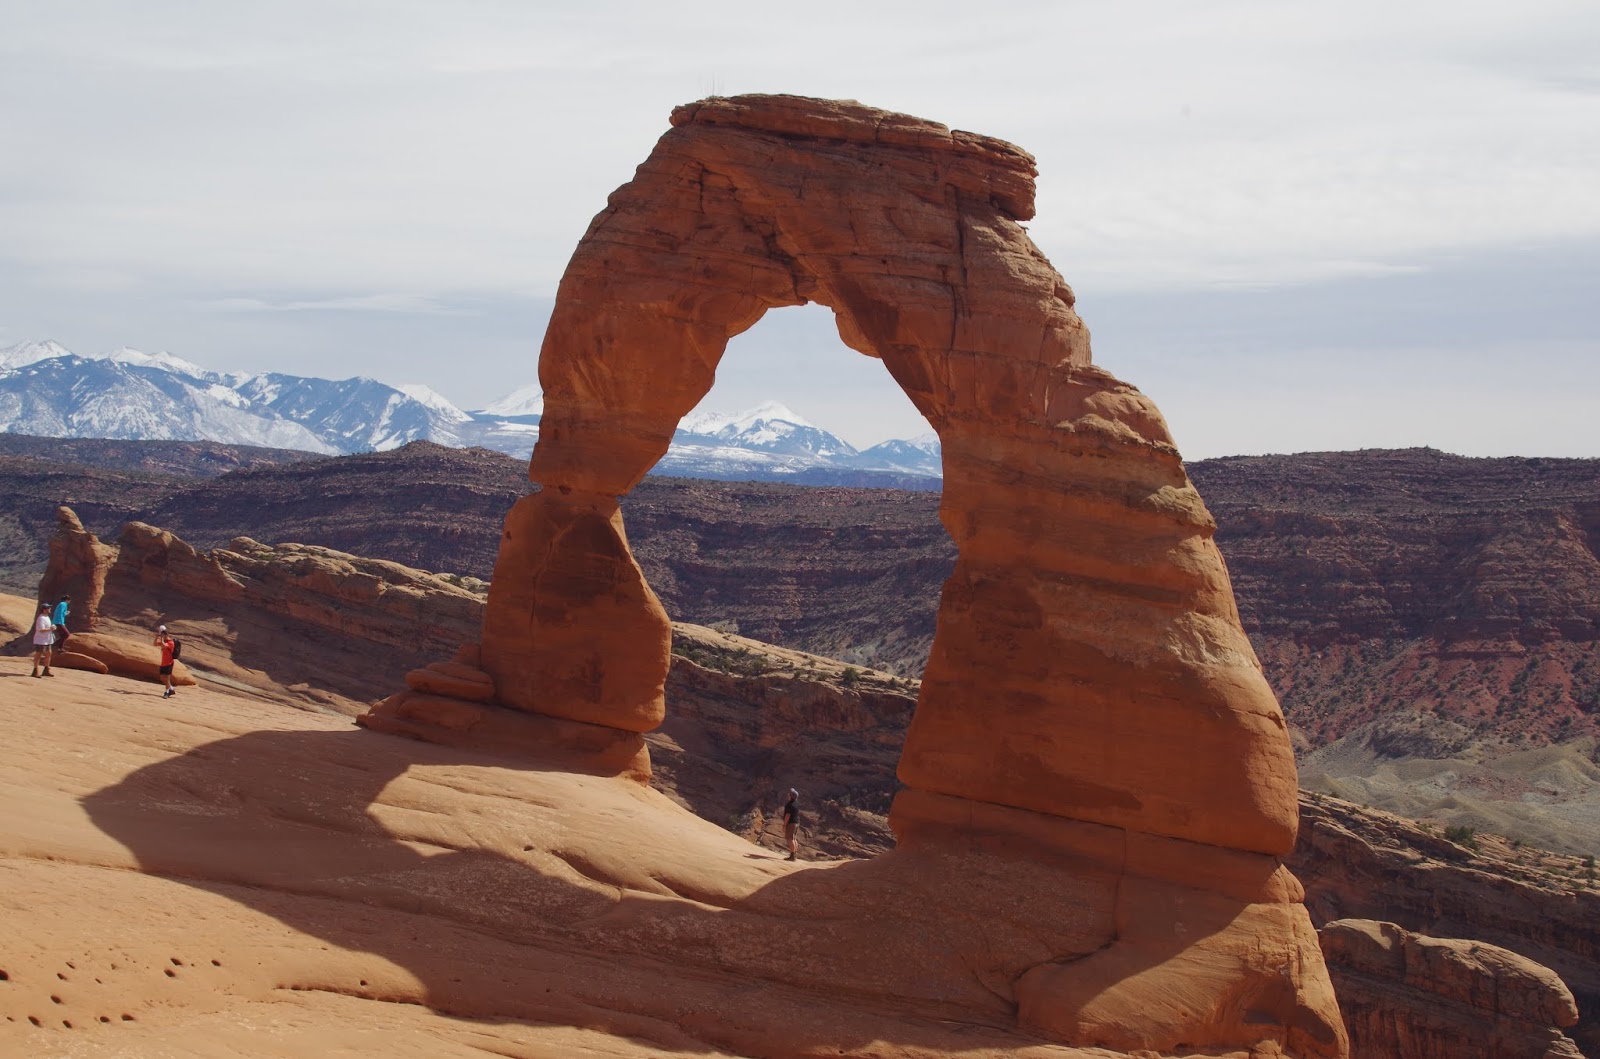
  • Delicate Arch: There are two ways to view this arch. One is the viewpoint which has two paths. They are fairly easy and quick to go to. The other option is to hike up to it. It is a 3.4 mile roundtrip hike on mostly slickrock. On the way there, it's mostly up hill. On the way back, it's mostly downhill. There is about 200 yards that are along a trail with a drop off on one side. We had our smaller children touch the wall so they stayed away from the edge.  The opportunity to be right by delicate arch was AWESOME!  I have bad knees and this hike was probably the hardest one that we did. I have a hard time when it is constantly downhill without a break, but I made it and was glad I could go with my family. I HIGHLY recommend using a hiking stick if you have any knee problems. 
CANYONLANDS NATIONAL PARK - NEEDLES DISTRICT
We decided to make the drive south to the Needles District of Canyonlands National Park. It was a bit of a drive, but it was a fun day. It wasn't as busy as Arches and had some fun hikes to go on. 
  • Newspaper Rock:  This is just off the side of the road on your way to The Needles. It is fun to stop and see the ancient writing on this huge rock! 
  • Visitors Center:  They have some information about that area of the park. They also have water and bathrooms that you can use. Most of the hikes in this area are longer but we did find out about a couple that our family could do. 
  • Wooden Shoe Arch: You can see this from a pull out. It's fun to take a picture of. 
  • Pot hole Point: (.6 mile loop) To me this place looked like the moon. If it has just recently rained, you might get to see some life in the pot holes. We saw some snails in a few of them. The views are beautiful. By far, our favorite part of the hike was climbing on some HUGE boulders and finding some lizards! 
  • Cave Springs: (.6 mile loop) This was another fun hike. It follows along the edge of a rock where you are able to see an old cowboy camp (it's fenced off), a spring, and some native american ruins. Then you climb a couple of ladders and walk across the top of the rock and back down to finish the loop. 
BEARS EARS NATIONAL MONUMENT
We realized that we were super close to Bears Ears National Monument when we were in the Needles District. We decided to drive the rest of the way and do a little hiking. We only had time for one hike but it was fun. 
  • House on Fire: (.9 mile/one way) There are some ancient american ruins that are underneath a cliff. You follow a stream bed most of the way and if you get there at just the right time, it will look like it is on fire. We got there in the evening at sunset time, unfortunately, it wasn't on fire. After talking to a friend who also did this hike, she said that the best time to go is about 9:30-10:00 am. I'm sure it changes but during the end of March/first part of April, that is the prime time. 
  • Bears Ears: By the time we got done with the House on fire hike, it was dusk. We decided to see if we could see the Bears Ears from a distance. We were able to make them out (faintly, because it was dark) from the road.
CANYONLANDS NATIONAL PARK - ISLAND IN THE SKY
The day we visited Island in the Sky, it was colder and windy. We were also all hiked out. Thankfully, Island in the Sky, has some AMAZING view points and we got our fix that way. I really think that a fun way to see Canyonlands (both Island in the Sky & Needles District) would be in a 4-wheel drive vehicle. There are trails all over in both sections of the park. Unfortunately, our minivan just wasn't up for those kinds of trails. :) 
  • Mesa Arch: (.5 mile, loop) This was a short but worthwhile hike. The view at the arch is beautiful and spectacular! This is the only hike that we did, but it was well worth it. 
I hope some of this information is helpful and that you are able to enjoy a trip to this beautiful, unique area. Some other locations you could visit would be Natural Bridges National Monument, Hovenweep National Monunment, and Mesa Verde National Park. They are all with in a days drive. We have been to these areas before and loved them as well. Enjoy your travels!


LDS General Conference April 2018: "Who Said It?"

This past weekend was LDS General Conference. This is where the leaders of the LDS church speak and share wonderful words of inspiration. (To find out more info or watch the conference talks, click here.) In an effort to help my family remember some of the things that some of the speakers said, I made up a game called "Who Said It?".
I used quotes from the First Presidency and Quorum of the Twelve Apostles.  First we put them into the correct order of seniority, then guessed who said which quote. We played it for Family Home Evening, but you could also use it for Primary, a Young Mens/Womens activity, or even seminary.
Here is the link to the files for the game.
Enjoy!

Wednesday, January 31, 2018

Perspective Changing Experiences

I think that you experience things in life that changes you. It changes how you view life, what your perspective is, your understanding of things, and many other things. Sometimes these experiences are things that happen to you but sometimes they are things that happen to others that you know and love. In my life, I have had both.
Just over five years ago, one of my good friend's husband was killed in a car accident. She and I were both expecting and it really hit home for me. Thankfully, her husband had very good life insurance, but no amount of money can replace a loving, kind, and good man to have by your side. She was able to get through the difficult time with faith, love, and support from family and friends. She recently married an very good man who loves her boys as his own.
Almost a year later, one of my best friends was diagnosed with cancer. This was her third time trying to fight this terrible monster. The first two times were breast cancer and she was victorious. This time it had gone after her liver, and unfortunately she passed away about two and a half months after the diagnosis. She was a lady that shined with goodness and light. She tried to think of others and was always there when you needed her. She left behind a wonderful husband and three beautiful children. Two who were in their teens (or close to) and one sweet girl that was three. I had the blessing of watching her little girl for a few years. It gave me the chance to stay close to her family and have a little bit of her in my home each day. Her husband remarried a beautiful woman and her children have grown into wonderful people. There is hardly a day that doesn't go by that I don't think of her. She has influenced my life far more than I think she knew.
Just over two years ago, I had a beautiful daughter. She came after a long line of boys and is a joy in my life. However, after giving birth, I began to experience a dark time in my life. I had postpartum depression. I have already written about it in a different post. Suffice it to say, it was one of the hardest times in my life.
This month, I've experienced two more of those kind of experiences. First, I suffered a miscarriage early in January. I was about 8 weeks along, although the sac only measured about 5.5 weeks. Thankfully I was able to have an ultrasound to see what was going on and they could not see a baby inside of the sac. The term is called a "blighted ovum". Sometimes the sac forms but no baby formed. It was a great comfort to realize that although I did lose a pregnancy, I didn't lose a baby. It was still a loss, but not as emotional as if there had been a baby there.
Then last Saturday, one of my dear friends, suffered a venous stroke. She is a few years younger than me and has three children, one that is only two weeks old. Last I heard, she was struggling controlling the right side of her body and with speech. I hope and pray that she can fully recover from this life changing event.
All of these experiences have taught me many things. I'm constantly reminded to be grateful for the time I have with my wonderful husband, with my children, and with other dear loved ones. I have also been humbled and learned again and again that I am not in charge. My plan is NOT always what GOD's Plan is. HE is the one in charge and He knows what we each need. I also have seen many tender mercies given to my friends and myself to know that GOD does LOVE US!
So as you go forward and have life changing experiences, know that you are not forgotten, even when you feel like you are.


Wednesday, January 3, 2018

Living Life even when you Struggle

Hi All,
I don't really know how many people read this blog. I know that I'm not very consistent with writing, but hope to find a way to do more this year.
Life for the past two plus years has been crazy for us. We bought, remodeled, and moved into a new home all while I was pregnant with our fifth child. After the baby was born, the house was a disaster still from moving (we moved when I was eight months pregnant about three weeks before Christmas), I was sleep deprived and had a new baby that took sometime to figure out. Don't get me wrong, I absolutely love our new home and our baby, but I was overwhelmed!

Then Summer hit and I hit a wall! I was grumpy with my kids, had a baby that was very fussy, a house that was still a mess, and didn't get much of a break from any of it. I would have thoughts about just driving into oncoming traffic so I could see what would happen. This WAS NOT me! Thankfully, my sweet husband told me "I can tell you are struggling. You need to get help NOW." So I went to my doctor and got a prescription for antidepressants and also started seeing a therapist.

Within a few weeks, I started feeling better and being more patient with my children. My crazy thoughts stopped coming and I finally felt somewhat normal. I have to say that most of that is due to the antidepressants.  I struggled connecting with my therapist and opening up to her. I tried, but I just didn't feel comfortable with her, so I couldn't be myself. I just put on the face that I put on most of the time. Anyway, by the beginning of 2017, I was off of the antidepressants and feeling good.

Then summer hit again and I could feel myself slipping. So I still had some of my prescription left and I started taking it more regularly. It helped. Once school started, I was able to wean off again. I can't say that I'm 100% but it's better than it was. I miss my old self and am trying to figure out who I really am. I think that mom's often feel like they lose a sense of who they really are. I know I feel that way sometimes.  This year, I hope to figure out who I AM!

Monday, April 4, 2016

General Conference Thank You Notes

In The Church of Jesus Christ of Latter-day Saints (LDS Church), we meet every six months in April and October for a General Conference (#LDSConf). It is an inspiring and uplifting experience and I always come away with a heart full of gratitude and a resolve to do and be better. 
This past weekend, we had General Conference. It was once again an amazing weekend of listening to those whom we believe are prophets and apostles teaching us the things that the Lord would have us do. 
As I listened to conference, I kept thinking of "Thank you" notes that I would like to write. I'm a Jimmy Fallon fan and love to hear his thank you notes that he writes. So I have come up with a few "Thank You" notes that I would write after General Conference. Here they are: 

1. Thank you, Elder Andersen, for letting us know that "While a child's earthly situation may not be ideal, a child's spiritual DNA is PERFECT!" That brings great comfort to this mom of a special needs child! Thank you!
2. Thank you, Elder Ballard, for telling us parents that what our children really need is someone to listen to them. And thank you for telling us all to put away the electronic devices and pay attention to each other a little bit more! 
3. Thank you, camera guy, for zooming in on Pres. Monson as he greeted Sister Ballard with a kiss on the hand. It helped us see how much he cares for other people!
4. Thank you, organist from Saturday Morning, for playing the hymns that were mentioned in the session as the postlude music after the meeting. It was beautiful. 
5. Thank you, Mormon Tabernacle Choir, for wearing blue during the Saturday Morning session. It made all of the families affected by Autism so happy to see you lighting it up blue in your own little way! (April 2 is Autism Awareness Day)
6. Thank you, Elder Holland, for helping to create a new tradition for many families of having ice cream after conference is over on Sunday night. My children appreciate you! 
7. Thank you, Pres. Uchtdorf, for lettting us see your heart as you stood with tears on your cheeks to conduct after Elder Kearon's talk about refugees. It reminded us, that you too, were once a refugee. 
8.Thank you, Elder Hales, for gathering the up the strength to come and share a wonderful message about the Holy Ghost and your witness of the Savior Jesus Christ!
9. Thank you, Sister Durham, for reminding us that the Holy Ghost will teach our children in the way that they learn the best. 
10. Thank you, Heavenly Father, for providing a prophet and apostles in our day to help guide us through this journey of life!

I could go on and on but I will stop. Here is a link to a summary of the messages from this weekend. 

Thursday, August 20, 2015

Helping your kids make school lunch

This year, I'll be making 3 school lunches each day. In the past, I have only had to make one. To help streamline the process, I have created a lunch making area in one of my cupboards. I keep all of the supplies needed there. I'm hoping it will help!
I also decided that my children need to help make their own lunches. To help them understand what to put in their lunch, I made this handy little chart and hung it on the cupboard with the lunch supplies in. I'm hoping it helps them in deciding what goes into their lunch.
What are some things you do that help lunch making go smoothly?


Wednesday, June 17, 2015

Keeping a routine during Summer Time!

One of the hardest things for me during the summer is changing up our routine and helping my kiddos adjust to being home all of the time. This summer I'm trying to help them understand that just because they are home, it doesn't mean that they get to be lazy or just play all day. They still have things that they need to do each day before playing. Don't get me wrong, their day is mostly filled of having fun, but I do need to have some help around the house. I also want them to having active learning experiences daily to help them stay sharp and remember what they learned in school. Soooo with the help of Power of Moms Summer Camp and Family Systems Programs, I'm trying to have a fun filled summer with the kiddos!
First I made a daily to-do list for each child. My kiddos LOVE lists so hopefully they will LOVE checking off this list each day. It's a basic list of things that they need to do each morning, afternoon, and evening. I'm laminating them so that they can use them over and over. I think I will tape them to our wall by our calendar and other family items. Here is a blank one and one that I have filled out.  So far, it's working well.
One suggestion that the Summer Camp program says to do is to have themed days for the week. I found a couple online that I liked, but decided to do my own twist. Here is a copy of what I came up with.
I'm still working on the daily jobs and will share that schedule after I get it done. I hope this helps someone out! The most important thing is to enjoy your kiddos and make some fun memories this summer!


Family Vacation: South Dakota

We just got back from our family vacation to Western South Dakota. We live about 10 hours away, but thought it would be a great trip for our family. It involved a LOT of driving (both to SD and around to the sights), but our kiddos did great. It helped that Grandma & Grandpa came along with us.

I have had a lot of people ask "What is there to do in South Dakota?" There is actually a lot to do. I was pleasantly surprised :) I decided to share some of the fun things that we did. I'll also attach our itinerary just so you can see how we did everything. Obviously, depending on how much time and the age of everyone going on the trip, would depend on what you do. But at least it gives you a jumping off point.
Highlights

  1. Mount Rushmore - I know, I know, everyone knows about Mount Rushmore. Can I just say that is truly is amazing and spectacular! 
    •  Make sure that you go to the movie and learn about why and how it was built. 
    • Go in the morning for great lighting and less people.
    • Go to the evening Ranger Talk and lighting ceremony. Stay for the retiring of the flag for the opportunity to honor all of the veterans in the audience. 
    • Get the Jr. Ranger booklets for your kiddos to do. Then make sure they get their badge. (my kiddos learned a lot and thought it was great to get a badge). 
  2. Wind Cave National Park - This is one of the largest caves in the world. It is really cool. This is a great choice if the weather is stormy.


    • Go there first thing. They often sell out of tours. (It's first come, first serve).
    • Natural Entrance Tour is good for kids. We went on this one. It was a lot of walking and not as much talking. The kiddos LOVED walking through the cave and seeing how cool it was. They were patient during the stories that were told, but I think much more talking would have lost their attention. 
  3. Custer State Park - There is so much to do here!
    • Sylvan Lake is a fun place to stop for lunch. There is a beach where you can get in and swim. You can also hike around the lake and some cool rocks in the area. 
    • Needles Highway is a must drive. It is beautiful and majestic. Lots of great photo ops.
    • Wildlife Loop is great especially in the morning or early evening. We went during the middle of the day and didn't see as much as we would have at a different time of day. We saw buffalo, prarie dogs, wild turkeys, burros, deer, and antelope. 
    • Iron Mountain Road - Another cool drive with fun tunnels and bridges. If you can't do the whole thing, start on the Keystone side and just go up through a couple of tunnels and then turn around and go back down. 
  4. Story Book Island - This is a MUST DO if you have children younger than 12. It is a park themed after stories, fairy tales, and nursery rhymes.  We played there for a good 3-4 hours. It is free and one of the highlights of the trips for the whole family. I don't have any picture without my kiddos, but just trust me, it's SO FUN!
  5. Crazy Horse Memorial - This is amazing. I found it fascinating to learn so much about people dedicated to a cause and what they are willing to sacrifice for it. 
  6. Stay in Hill City - Hill City is centrally located but isn't as much as a tourist trap as Keystone and Custer. It's a quiet little city with some fabulous eating places (Bumpin' Buffalos, Alpine Inn, Hill City Cafe) and some fun museums and shopping. We stayed at Trails End Cabins. Can I just say, if you can at all possibly stay there, do so. Doug and Mary are the owners. They were so helpful and kind. They were willing to make suggestions and answer any questions that we had. There is a firepit, hot tub, patio, and bbq area that we enjoyed using. It is just a couple of blocks off of the main road and borders a forest area. It feels like your in the forest away from the city. Their prices were comparable to other hotels in the area and the service was beyond compare! 
That was our trip in a nut shell. If you want to see how it all came together. Here is a copy of our Itinerary. 

Thursday, March 5, 2015

Calling All Odd Squad Fans!

We made it through the birthday party! Yay! This was definitely challenge. I had to do it the old fashioned way! I watched several episodes of the show and played the games online. That helped to get the ideas flowing! Here is what I came up with.
 1. Badges as name tags
I made a page of badges and just printed it on yellow paper (saved me tons of colored ink :)). As each child came, they wrote their name and we taped it on their shirt. They also each received a small magnifying glass (dollar store, party favors section).  Unfortunately, the magnifying glasses didn't even make it through the party. (I think I would have just included them in the party favor envelope if I did it again).
2. I found a picture of a magnifying glass. I printed 3 pages off (2 per page). On each one, I wrote a mission (and numbered them). Here are some pictures of them.

I hid them all over the room and we had to find each mission clue and then do it before finding the next clue. We ended up skipping #4 because we had already done it as part of another game. The kids loved finding each mission.
The missions that we did were:
#1 - The shape monster came and hid all of the shapes. Can you find the shapes??  Each child looked for the shapes. After we found them all, we sorted them by shape and then colors.
#2 - The centigurps have escaped! The only way to get them back into their boxes is by carrying them on your head. Work with your team to get them in quickly! I bought a pom pom maker (such a great tool, I got mine at Micheal's) and made 20+ bright pink pom poms. They were a big hit! We divided the kids into two teams and gave them the same amount of centigurps. One child from each team ran with it on their head and dropped it into a box. Then ran back to their team and the next child went. The kids LOVED it and had a fun time. They enjoyed the centigurps so much that we put them all on a small parachute and tossed them up and down. When they all fell off of the parachute, we stopped and the kids had to catch them and put them back on. 
#3 - Agents need to stay in shape! Practice by going through the obstacle course. My friend has a gymnastics triangle and a hopscotch carpet. We borrowed those and used folding chairs for the kids to weave around ( you could use cones , we just didn't have any). We also had them throw ball pit balls into a basket. You could use anything around your house to make a fun obstacle course. The kids loved this one too! 
#4 - The ball pit balls are going crazy, try to keep them in the parachute without losing any! We didn't do this because we had used the parachute with the centigurps. 
#5 - All agents need to refuel. Take a break and have some lunch! I usually don't do food at parties because I would rather spend my time and money on games and the gifts we send home. However, I bought some cheap pizza and juice boxes for this party. I did this so I didn't have to worry about feeding my kids after the party. It was nice to take a break and eat for a few minutes. 
#6 - It's important to practice you counting skills! Play a little game of dice and cover the numbers as you go. I found some big dice at the dollar store and a four-leaf clover with numbers on it. The kids rolled the dice and cover the number. It was a fun game. 

After all of the missions were complete, we opened presents. We still had a few minutes before the party ended, so we decided to make special agent called #5 (that's how old the birthday child was turning). I found a number 5 and printed out a bunch and cute them out. The kids colored them, made arms and legs, and decorated them. 


As the party favors, I tried to put thing in that connected with the games we played. They each got a balloon, bouncy ball, two centigurps, a detective notebook and pencil.  I was going to put two dice in them, but forgot to pick them up at the dollar store when I was there. All of the items went into a small manilla envelope that had Top Secret written on it. I wrote their names on the envelopes as they picked them up. They had strict instructions that the envelope was top secret and should only be opened at home! The kids thought it was great!
The notebook had pages of activities that they could do. Some of the pages, I found online and edited them to make them work. Some I made my self. The notebook were the size of a 1/2 sheet of 8.5x11 paper. 
My kiddo that wanted the Odd Squad party was delighted with how it turned out. To me that meant that it was a successful party!
Here is a link to the files that I used.  As always, if you have any questions, please let me know! 
Have a Extraordinary Day!

Monday, February 23, 2015

Odd Squad Party Invitations

Update: Check out the next post for the link to ALL of the files that I used including the party invitations! 
My sweet boy that is turning 5 in a few weeks, informed me that he wants to have an "Odd Squad" party! I was less than excited to organize this party because Odd Squad is a brand new show on pbs. The problem is that I have to create everything from scratch because there just isn't much out there for this show yet. It's a great little show that has odd things happen and the kids figure out the solution using math concepts. My kids LOVE it.
So today, I made up the invitations. I thought I would make some for those who might want one as well. I just found a graphic of the badge and went from there. This is what I came up with. There is a link in the next post to ALL of my Odd Squad Party files, including these invitations. I also have a black and white version. There are four invites to each page and you just print them back to back. I used the black and white ones and printed them on yellow paper. It turned out great (and easy). I'll post more about the party after it actually happens! Good Luck!


Saturday, February 2, 2013

Birthday Gifts - Week 1

I was going to blog as I did each thing on my birthday list. But I don't have that much time, so I'm going to write (try to) once a week. I have found that I have changed some of the original ideas to fit our needs/experiences. Regardless of the changes, they are still random acts of kindness.
 So here are the things that we (I try to have the family help me) did this week.

#4. - Flowers to Hospital - actually I let C pick out flowers for his grandma who had a knee replacement a few weeks ago. He thought it was great! He said "We have to find one with purple flowers, because purple is her favorite color." He was so excited to give them to her.

#9. - Books for needy child - Again, I changed this one. It was Parent/Teacher Conferences this week. Of course, there was a book fair as well. We let L & C pick out books for their classes. It was fun to see how excited they were to give the book to their teachers. The teachers were excited to get a new book too.

#19. - Be a personal shopper for someone - I just picked out books for L's teacher. She had a credit and wanted some books, but was tired and didn't know if she would make it to the book fair before it closed. I offered to go get the books for her.

#30 - Let someone in front of you in line - My cart was full and guy came up behind us with just one item. I let him in front.

#35 - Make dinner for someone - I helped make dinner for the teachers one night during conferences. The lady that was in charge got sick and they needed some help. So I helped out.

I realize that I didn't do one each day, but I have been trying. The part that I love best is seeing my children experience the joy of serving.


Friday, January 25, 2013

My Birthday Gift

I had the wonderful experience of spending my birthday at Disneyland. That in and of itself made it a special day. A few months ago, I saw this blog post. I was planning on doing something similar for my birthday, but it didn't work out with being at Disneyland.
So I decided that instead of doing all of those things in one day, I'm going to try to do the following things over the course of the next 36 days. I'm not doing them in any particular order, just what I feel like needs to be done that day. Here is my list, but it is subject to change :)


Random Acts of Kindness

1. Mailman package
2. Firefighter treats
3. Assisted living visit - hand made cards.
4. Flowers to the hospital
5. Homemade coloring books and crayons in waiting rooms
6. Change in the vending machine
7. Treats for mechanic
8. Food pantry
9. Books for needy children
10. Notes to church leader
11. Treats for librarian
12. Collect carts at a store
13. Presents to random children at a park
14. Send a note to a missionary/ military person
15. Hiding dollars in toy aisle of Dollar tree
16. Buy something from dollar store to give to someone
17. Buy a book to pass along
18. Read a book to a child
19. Be a personal shopper for someone
20.  Treat someone to lunch
21. Leave a gift for the server
22. Mail out some coupons with a note.
23.  Leave diaper and wipes on a changing table
24. Run an errand for someone
25. Pick up trash
26. Leave a smile
27. Pass out silly bandz to random kids.
28.  Drive nice
29.  Donate to good will
30. Let someone in front of you in the line.
31. Give a care package to a homeless person
32. Spend time playing with your children.
33. Call a friend just to talk
34. Mail your neighbor a thank you card
35. Make dinner for someone just because
36. Pay for the car behind you at the drive thru
I have some other ideas as well, but am planning on making it through this list first.
Today was my first day at it. Today I did number 31. I keep a stash of "homeless" care packages in my van. When ever I see someone with a sign, I try to give them one. It is neat way to help someone who is in need without giving them money. It is also neat to see my children help me "find" the people we want to help.
Some ideas of things to include in a 'care package' are:
granola bars
gloves
socks
hats
fleece blanket
bottle of water
tissues
soap
chap stick
little cup of fruit & a plastic spoon
wipes
deodorant
Here is a website with lots of other ideas too.
I just pop a few items in a grocery bag and tie it shut. I then store the grocery bags in a plastic box by my seat that I can get to easily while driving.


Wednesday, January 23, 2013

Disneyland 2013!

We just got back from our family vacation for this year. We went to Disneyland. This was the first time that I had been since I was about 10 years old. Our children were so excited to go for the first time. I tried to find out some tips for going with young children, children with special needs, and being pregnant. There were lots of websites that I found to be helpful. I decided that I would share some things that we found useful during our visit to the Magic Kingdom. Take them for what they are worth!
(We had 3 day passes with one Magic Morning Entry to Disneyland. We have 3 small children (3,4,7) and I'm 6 months pregnant. Our oldest is on the Autism Spectrum. We were also trying to save as much money as possible:)

Tips:
1. FOOD: Take lunch and healthy snacks with you. We ate breakfast at our hotel and then headed out for the day. We made lunch before leaving and took TONS of food with us in our stroller to munch on throughout the day. This proved to be very nice because we didn't have to stop to eat dinner, we just ate a snack. After the park closed (8p.m. in the winter), we took time to eat. 
     We found that having a fridge and microwave in our hotel room was so nice. It meant that we could make our own meals if we wanted to. We also found that Mimi's Cafe and Food 4 Less were two places that had reasonable prices. We utilized their coupons and were able to save extra money.
2. WATER:  Take a water bottle and stay hydrated! There are numerous water fountains located in both Disneyland and California Adventure. We took water bottles with us and refilled them when ever we had a bathroom break. For me, I found that I stayed hydrated better if I took the lid off of the water bottle rather than sip it from the spout. I also found that the days that I stayed hydrated, I felt better and wasn't as tired by the end of the day.
3.  SPECIAL NEEDS: We picked up a "Guest Assistance" pass the first morning that we were there. Basically you talk to a  cast member about the needs you have and they give you a pass to help you out. It was a blessing for us.
4. PREGNANT: I was concerned that I wouldn't be able to go on a lot of the rides. I was pleasantly surprised when I found that there were no warnings concerning any health concerns on most rides. I also learned that the warnings are only "recommendations" and that they won't stop you from riding those rides. I have to admit that I did choose to go on some of the rides with warnings. That was a personal choice and I recommend that you decide what your body and baby can handle. If I had any question about my safety, then I didn't go on it.
     Another tip that I would recommend is purchasing a maternity support belt. If you are just barely pregnant, you may not need one. However if your tummy is showing, I would HIGHLY recommend it. There are several on the market. This is the one that I used, but I'm sure any of them would work fine. I found that this was a lifesaver! I know that it helped me in a lot of ways. At first, I was very embarrassed to be wearing it. But as I wore it, I saw how much it helped and I stopped complaining about using it. I don't know how I would have made it without one.
     The last tip for pregnant women, let your husband pick up the little ones, push the stroller, and do all of the extra stuff that needs to be done. I didn't do this the first day and by the time that we got back to the hotel, I was feeling it. The next two days I was better about it and it made a HUGE difference. My husband was a star about helping me out and I appreciated it SO much!
5. MAGIC MORNING: I didn't realize that the Magic Morning entry only applies to Tomorrow Land and Fantasy Land. For us, we had our choice between Tuesday or Thursday. Since our first day in the parks was on Tuesday, we opted to save it for Thursday. It was hard to get up and get going that morning because we were so tired, but I'm glad that we used it. We chose to hit Fantasy Land because it gets SO busy during the day. It worked out great for us and we were able to ride the rides we hadn't gone on because of long lines.
6.  TIMING:  We found that timing was everything. We tried to get to the parks early and found that to be very rewarding. On Tuesday, we were there when California Adventure opened up. We walked into Cars Land and found that EVERYONE was headed for the Radiator Springs Racers ride. We noticed that Lightning McQueen was waiting for people to come see him. We were able to walk right up and talk to him. We also were able to walk right onto the other two rides. By the time we went on the Racers ride, we didn't have to wait as long. It was sweet!
7. HIDDEN GEM: A hidden gem that we didn't know about until the last 30 min. of our last day was
Redwood Creek Challenge Trail! This is taken from  the movie "Up" and is a course for children to earn "wilderness badges" My husband had mentioned it, but I didn't know what it was until we were passing by and saw the signs. Our children LOVED it. It was a great way to end the day. They were tired and complained about going in, but once they were in, they didn't want to come out! My only regret was that we had tried it out sooner.
Our trip to Disneyland was magical and wonderful! I hope that the insights that we gained can help your trip to be just as magical for your family. We highly recommend going in January! It was warm, not crowded, warm, fast lines, and did I mention WARM? (At least from our perspective of 20degrees :)